

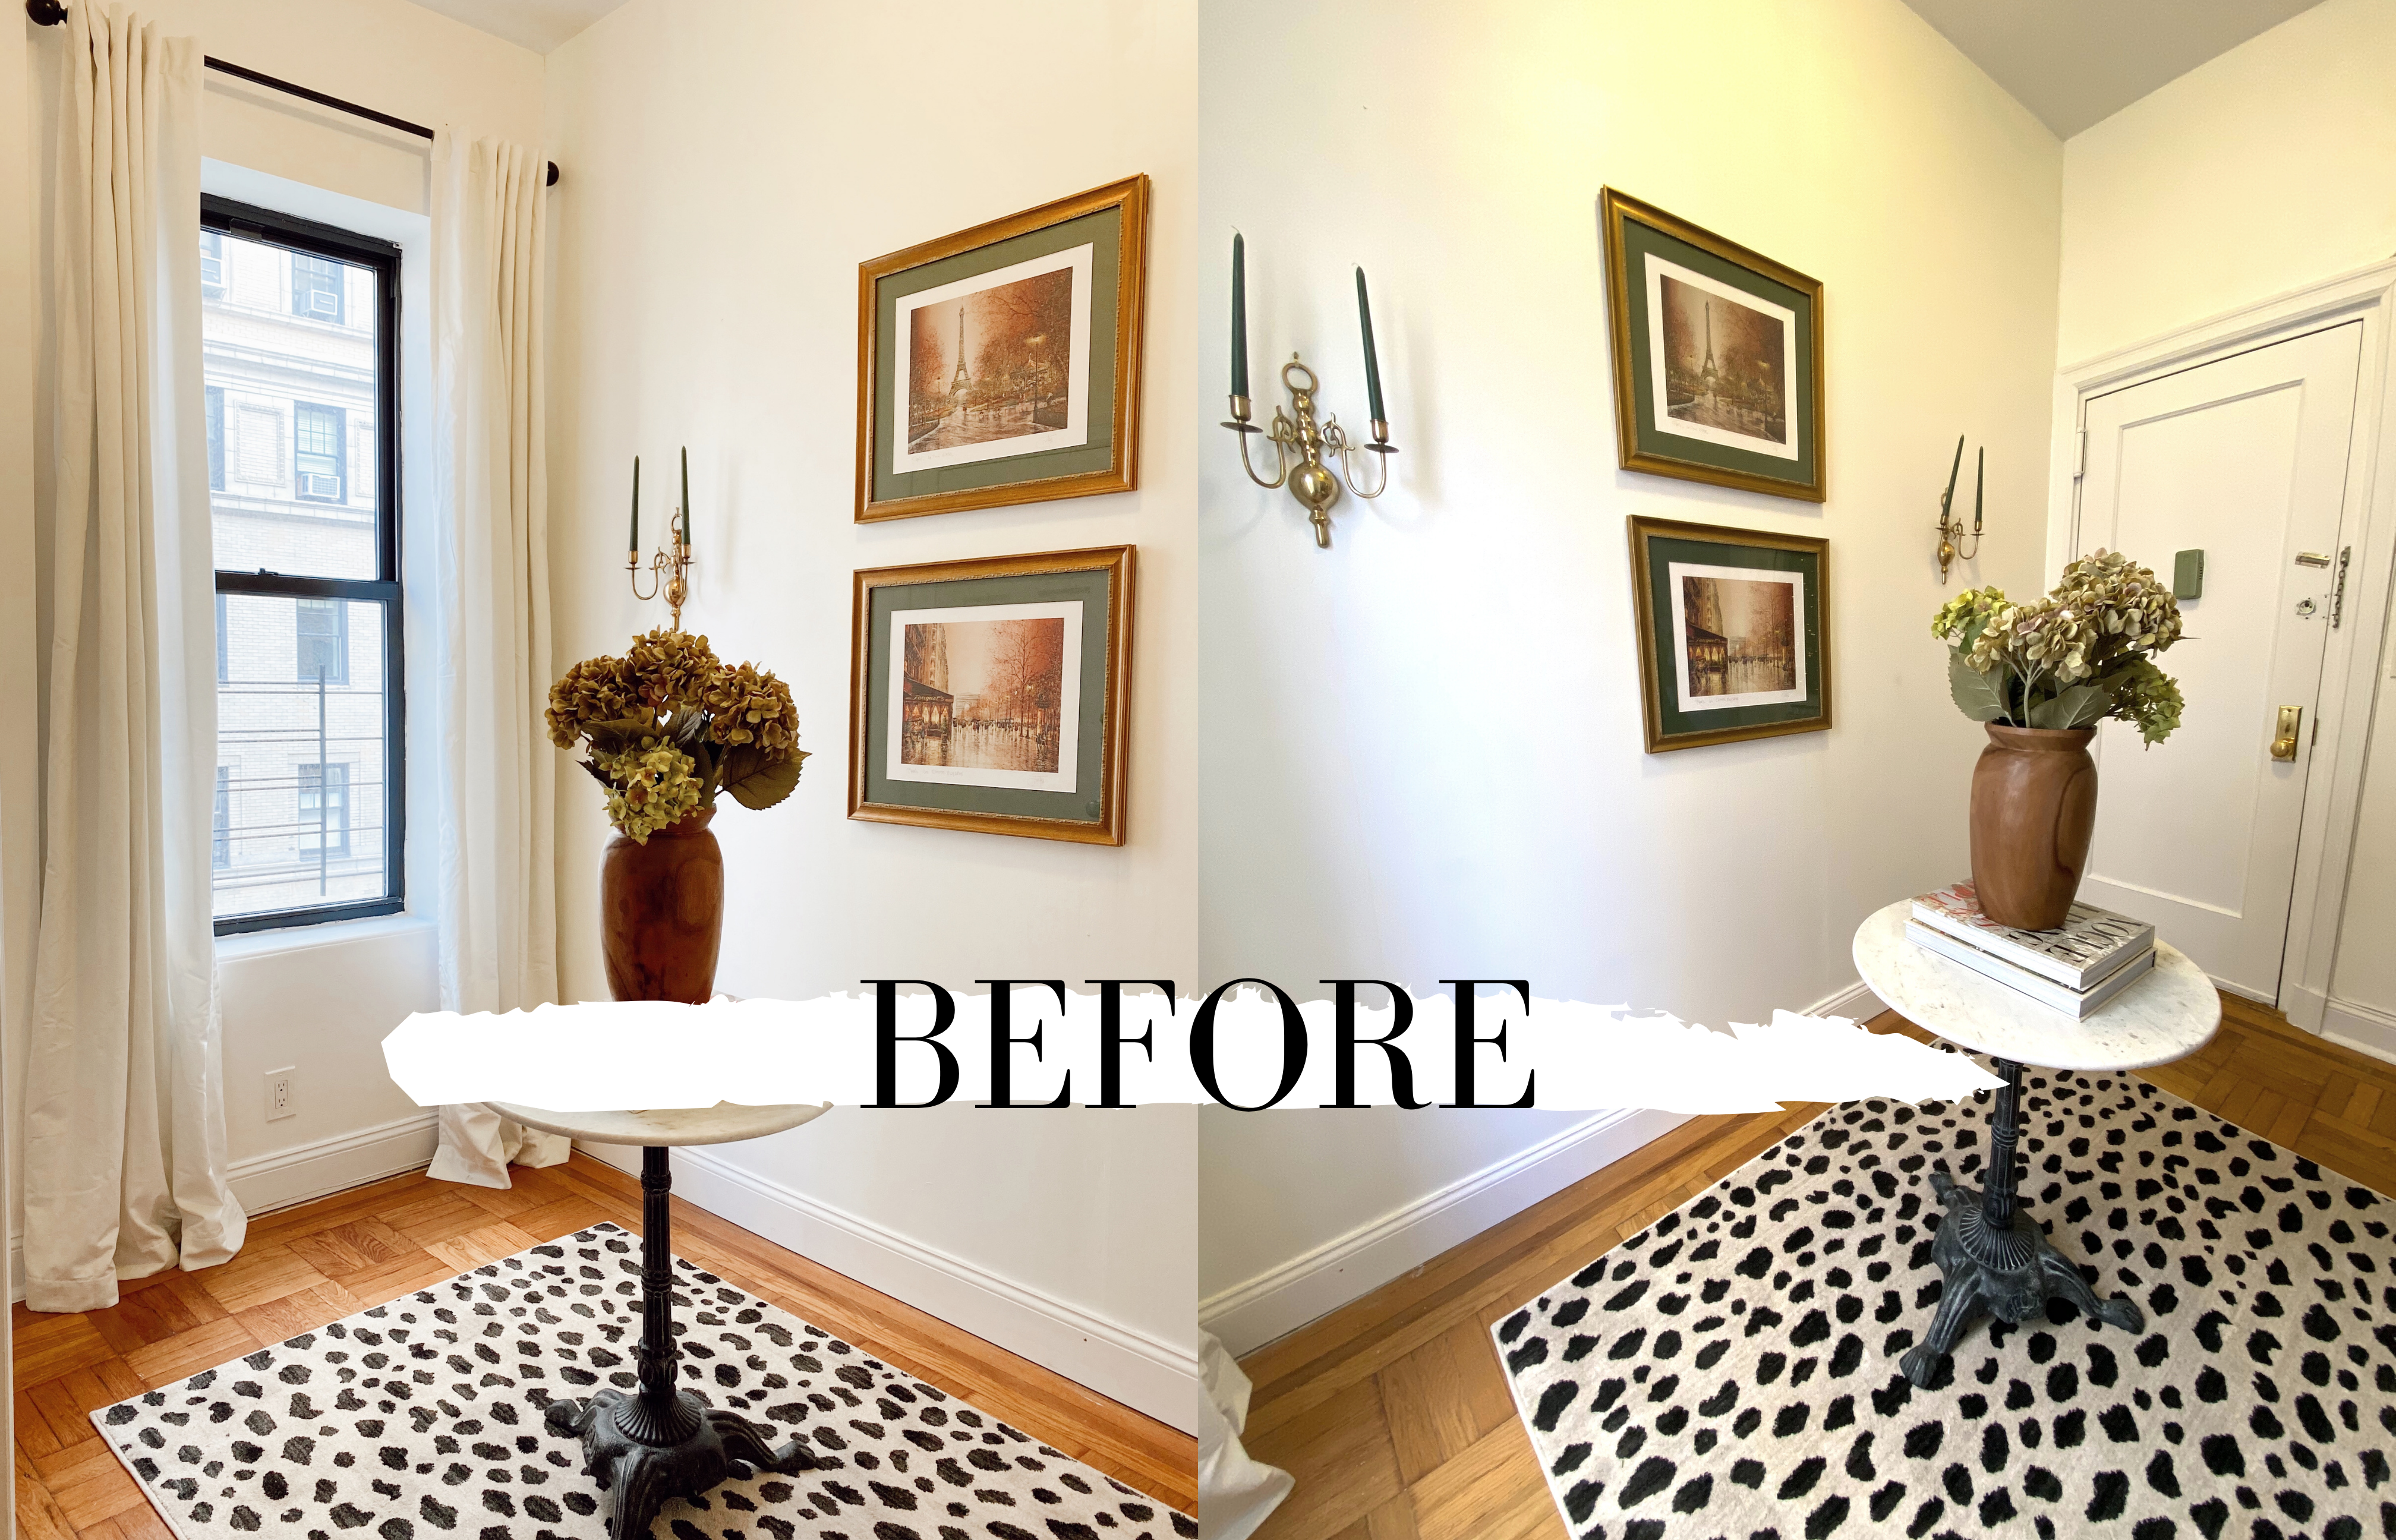
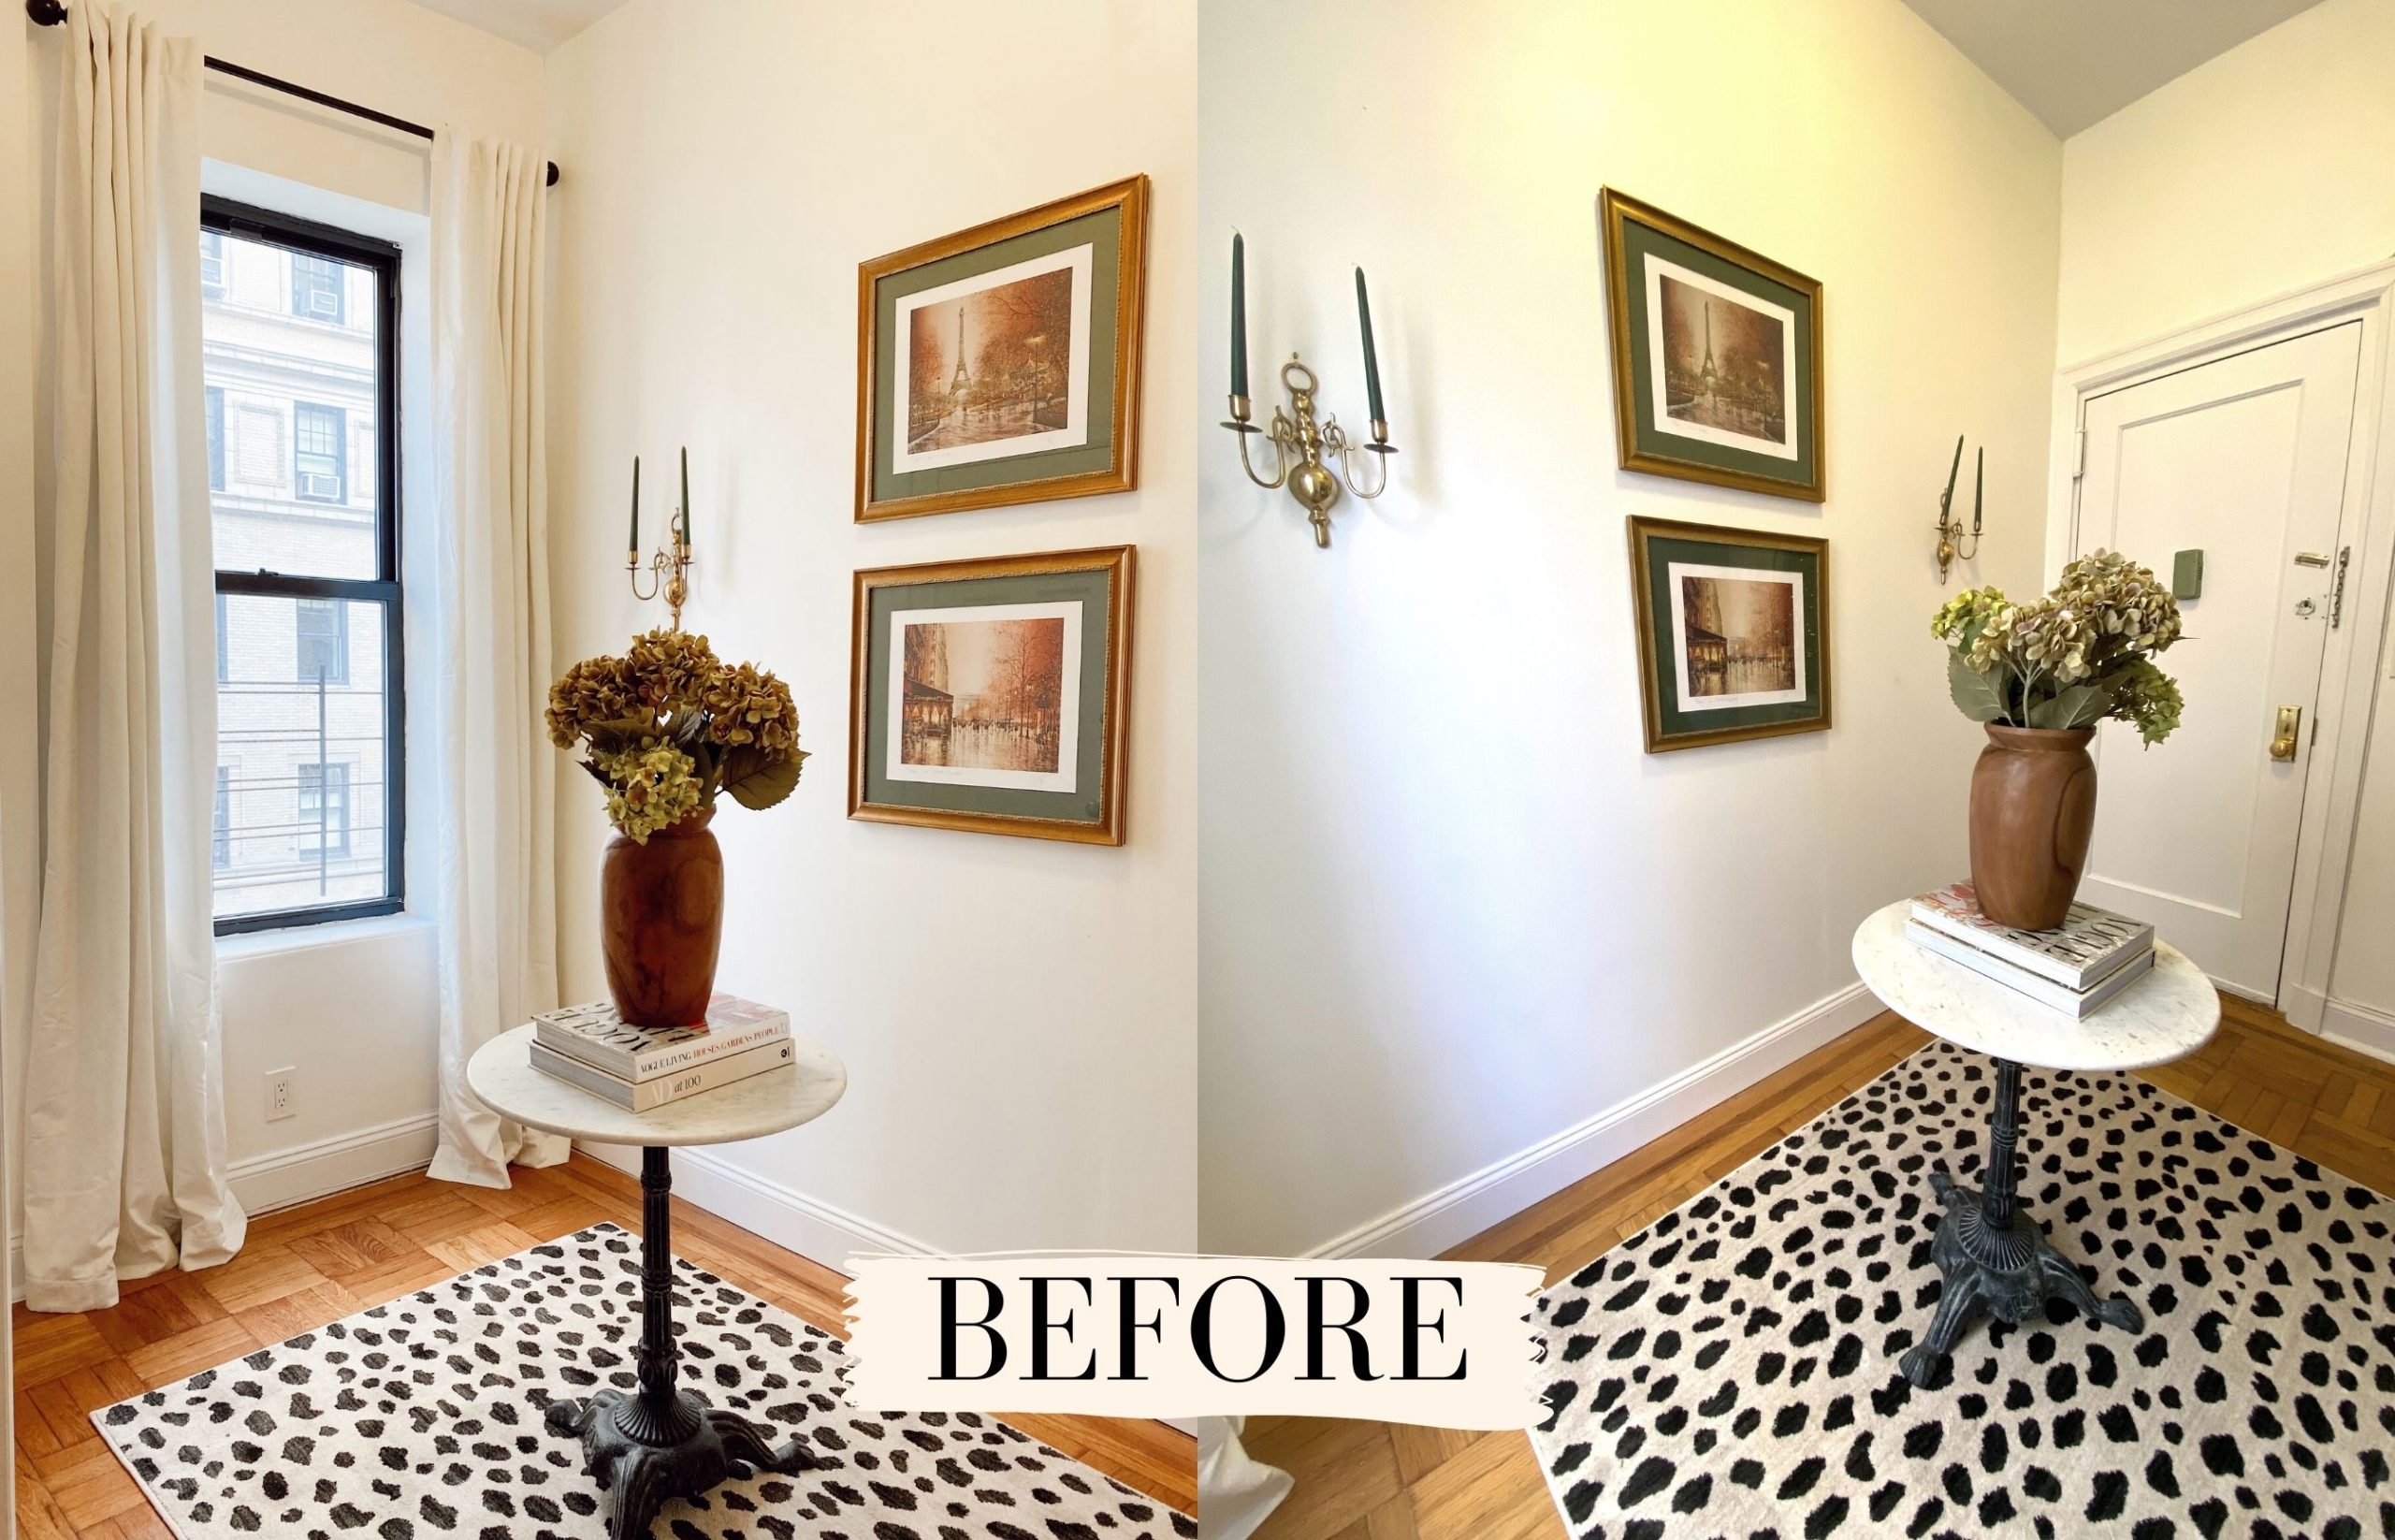
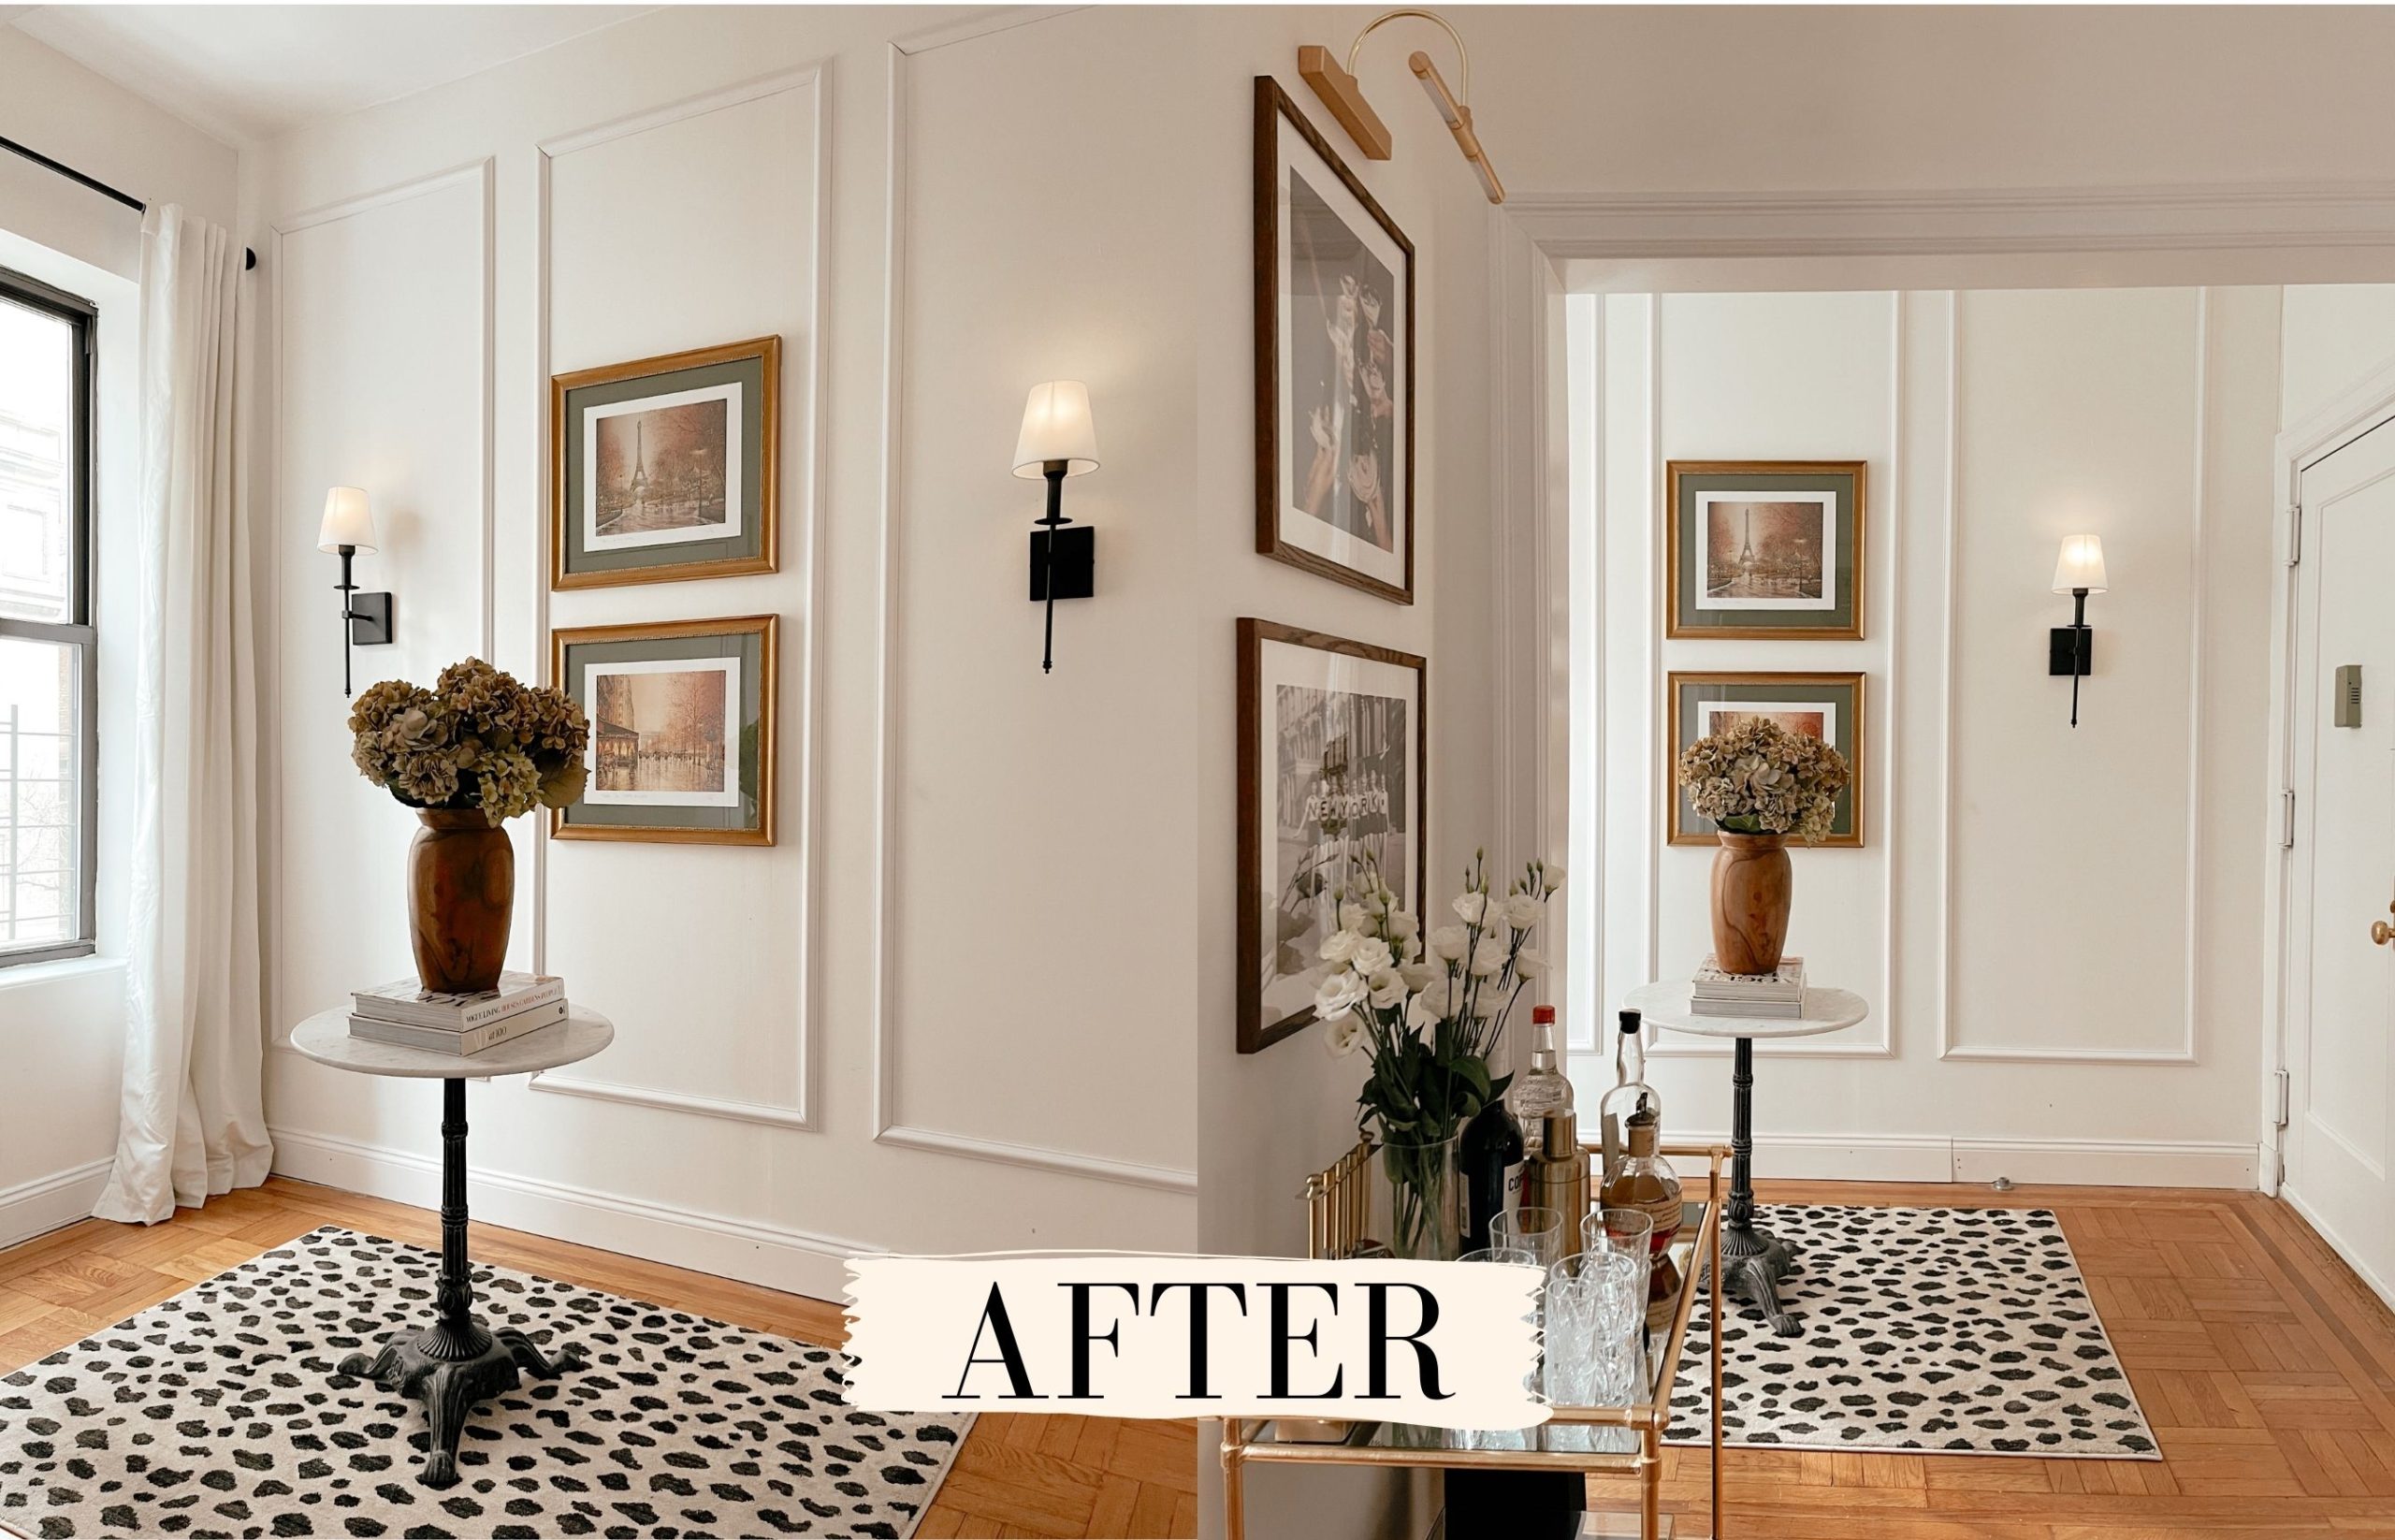
This weekend we added a design touch to our space that we had been planning on doing since before we moved in. I wanted to add wall molding (aka picture frame molding) to our space but wanted to attempt a renter friendly version of it. Traditionally adding this to walls would involve wood trim and a lot of nail holes so the goal was a lighter option than wood and no nail holes!
The Inspiration:
If you look on Pinterest for Modern Victorian or Parisian Interiors you will find a lot of this same wall molding that we added here. It was also big in the 90’s (peep it on the set of Friends) but is making a major comeback. It adds character and interest to a space without necessarily having to hang a frame or mirror on the wall. And plus, aren’t we all trying to have a slice of Paris in our own homes?
The Materials:
- Wall Molding – This option is insanely lightweight and the most cost effective option I could find! It looks just like wood trim.
- Mounting Tape – This is what we used instead of nails to attach the trim. You might need to lightly patch if you ever have to remove this but it should not be a huge issue.
- Box Saw – The material is really easy to cut and this will ensure the perfect angles.
- Measuring Tape – Duh.
- Long Level – We like perfect lines around here.
- Paint and Caulk Optional – If your walls are anything other than white, you’ll want to paint the trim to match. Caulk might be needed where the horizontal and vertical pieces connect.

The Process:
- Pick Your Spacing – Some people (my brothers) probably use some sort of equation to perfectly measure out the spacing of the molding on their wall. For us, it was an imperfect science that lead to us going with what we thought looked best.
As a result, our primary goals were (A) to keep the distance from each conjoining wall *close to the same on each side, (B) keep the width of each rectangle exactly the same, and (C) keep the distance between the squares the same. Your measurements will change based on what space you’re working with but for reference, here’s ours:
Distance from each conjoining wall (outside rectangles): 8 Inches
Height of each rectangle: 94 Inches
Width of each rectangle: 30 3/4 Inches
Distance between each rectangle: 5 Inches
- Measure and Cut – Once you figure out the measurements of each rectangle, mark the measurements on the molding, and then cut it diagonally using the box saw to guide your cuts. *This may go without saying, but make sure the diagonal cuts align properly. As my dad always said, measure twice, cut once. Be safe!
- Tape and Hang Molding – Each vertical piece of molding used 3 pieces of double sided tape, around 8 inches each. Each horizontal piece used only 2 pieces, around 6 inches each.
*Do not peel off the wall side of the tape just yet!
To hang the molding, we started with the vertical molding first (this made determining the exact length of the horizontal pieces much easier) and used the long level to make sure they were hung at the same height. Once we had the height figured out, we used the long level to make sure each vertical piece was hung perfectly straight.
A. Start at the bottom of the vertical molding, keeping the molding in place from where you marked its height.
B. Remove the wall side of the bottom-most piece of double-sided tape.
C. Align the molding with the level, holding them vertically parallel together, and place the molding against the wall, pressing firmly to make sure it sticks.
D. Move upwards to the next piece of tape and repeat the above process. *Keep in mind that we needed a ladder for highest parts of the molding.
E. The horizontal pieces are easy once the above process has been completed. We measured the width (they should all be the same), cut the pieces, leveled and mounted.
We were really happy with how this space turned out and were truthfully shocked at how much it transformed the room! It instantly feels elegant and boujee. The project took two hours total and around $100 for the materials. Leave any other questions you have below!
Xx,
Anna & Nathan
Shop This Space Here

Where is the molding from?
It’s linked in the body of this post!
Sorry if this has been asked. The double sided mounting tape you mentioned you used for the trim says permanent on it. Would it be suitable to use other 3M recoverable options?
I can’t speak to any other products since this is the only one I’ve used but it’s worth a shot! In my experience this tape isn’t permanent though!